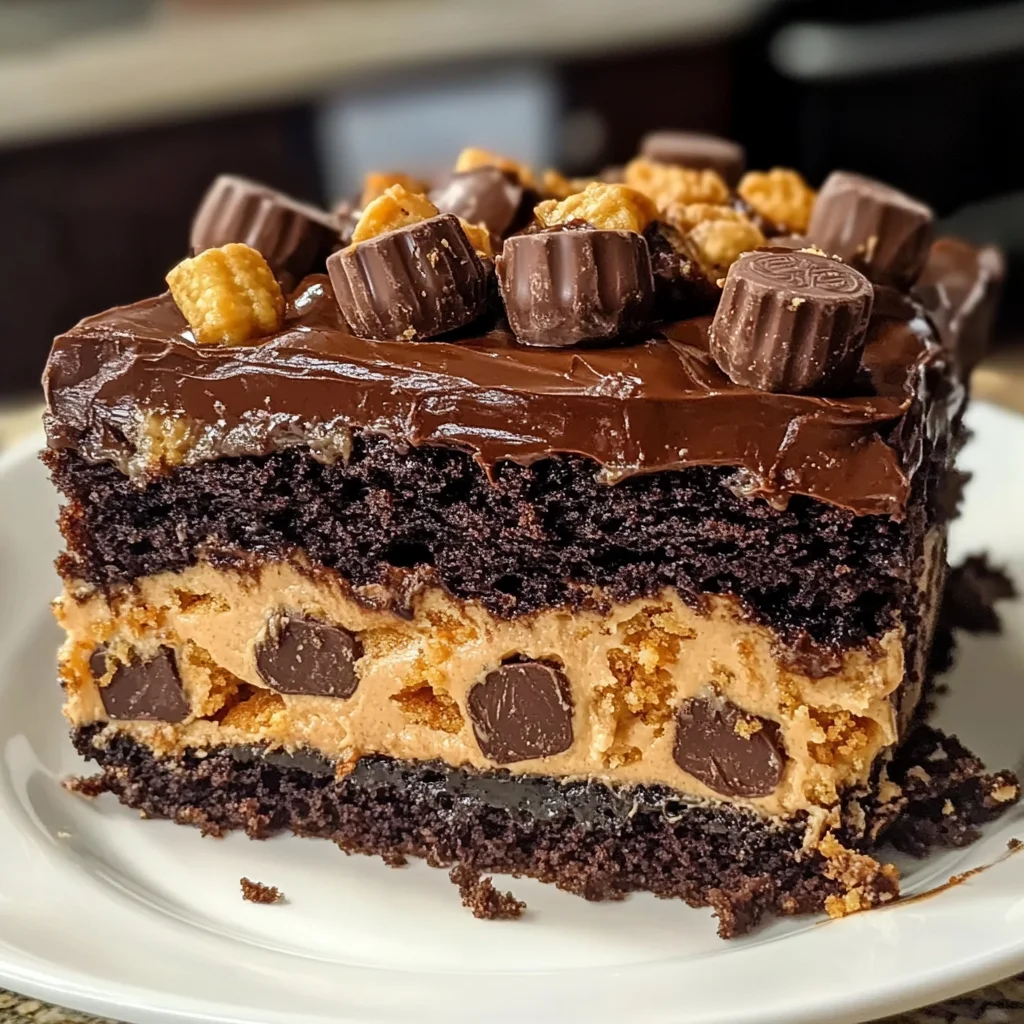
Reese’s Peanut Butter Earthquake Cake
If you’re looking for a dessert that will impress family and friends while being incredibly easy to make, then let me introduce you to my favorite indulgence: Reese’s Peanut Butter Earthquake Cake. This cake is a delightful combination of rich chocolate and creamy peanut butter, with a gooey center that practically begs to be devoured. Whether it’s a busy weeknight craving or a special occasion, this cake is sure to steal the spotlight and bring smiles all around.
What makes this recipe extra special is its simplicity. You can whip it up in no time, and the combination of flavors is nothing short of heavenly. Plus, who can resist the allure of chopped Reese’s cups sprinkled on top? Trust me, this cake is bound to become a cherished favorite in your home!
Why You’ll Love This Recipe
- Super easy to make: With just a few simple steps, you’ll have a decadent dessert ready for any gathering.
- Family-friendly appeal: This cake combines chocolate and peanut butter—two flavors that kids (and adults) absolutely adore!
- Perfect for sharing: Cut into generous squares and watch as everyone comes back for seconds.
- Deliciously gooey center: The creamy peanut butter layer creates an irresistible texture that keeps people coming back.
- Versatile for any occasion: Whether it’s a birthday party or just a cozy night in, this cake fits right in.
Ingredients You’ll Need
Let’s gather some simple, wholesome ingredients that come together beautifully in this Reese’s Peanut Butter Earthquake Cake. You probably have many of these on hand already!
For the Cake
- 1 box chocolate cake mix
- 1 cup water
- 1/2 cup vegetable oil
- 3 large eggs
For the Creamy Layer
- 1 cup creamy peanut butter
- 8 oz cream cheese, softened
- 1/2 cup unsalted butter, melted
- 4 cups powdered sugar
- 1 tsp vanilla extract
For Topping
- 1 cup Reese’s Peanut Butter Cups, chopped
Variations
One of the best things about this recipe is its flexibility. You can easily customize it based on your preferences or what you have on hand!
- Make it gluten-free: Use a gluten-free chocolate cake mix for a delicious alternative that everyone can enjoy.
- Add some crunch: Mix in chopped nuts like peanuts or walnuts for extra texture and flavor.
- Try different candies: Swap out Reese’s cups for other favorites like Snickers or M&Ms to create your unique twist.
- Create mini cakes: Bake the batter in muffin tins for adorable individual servings perfect for parties.
How to Make Reese’s Peanut Butter Earthquake Cake
Step 1: Preheat Your Oven
First things first—preheat your oven to 350°F (175°C). This step ensures that your cake bakes evenly from the start. While that’s heating up, grab your trusty 9×13-inch baking dish and grease it well so that nothing sticks!
Step 2: Prepare the Chocolate Cake Batter
In a large mixing bowl, combine the chocolate cake mix, water, vegetable oil, and eggs. Mix until everything is well combined. Pour this luscious batter into your prepared baking dish. The foundation of your earthquake cake is now set!
Step 3: Make the Creamy Peanut Butter Mixture
In another bowl, blend together the creamy peanut butter, softened cream cheese, melted butter, powdered sugar, and vanilla extract until smooth. This mixture is going to create that delightful gooey center we all love!
Step 4: Swirl It Together
Now comes the fun part! Drop spoonfuls of the peanut butter mixture over the top of your chocolate batter. Take a knife and gently swirl it through the batter—this creates those beautiful marbled layers that make each bite special.
Step 5: Add Some Sweetness on Top
Sprinkle those chopped Reese’s Peanut Butter Cups evenly over the top of your cake batter. This step adds an extra layer of sweetness and makes every slice even more tempting.
Step 6: Bake Away!
Pop your masterpiece into the oven and bake for 35-40 minutes. Keep an eye on it! Your cake is done when a toothpick inserted into the center comes out mostly clean—just remember some gooeyness is perfectly fine!
Step 7: Cool and Serve
Once baked to perfection, allow your cake to cool slightly before serving. It can be enjoyed warm or at room temperature—either way is delicious! Slice yourself a generous piece and savor every mouthwatering bite.
Now you’re all set to create this delightful Reese’s Peanut Butter Earthquake Cake! Enjoy sharing it with loved ones—or keep it all for yourself (I won’t tell!).
Pro Tips for Making Reese’s Peanut Butter Earthquake Cake
Creating the perfect Reese’s Peanut Butter Earthquake Cake is a delightful journey, and these tips will ensure you elevate your baking game!
-
Use room temperature ingredients: Let your eggs and cream cheese sit out for about 30 minutes before mixing. This helps create a smoother batter and a fluffier cake.
-
Don’t overmix the batter: Once you’ve combined your ingredients, mix just until everything is incorporated. Overmixing can lead to a dense cake, which we definitely want to avoid!
-
Swirl gently: When you’re adding the peanut butter mixture to the cake batter, use a light hand when swirling. This will create beautiful marbling without completely blending the two mixtures together.
-
Check for doneness carefully: Since ovens can vary, start checking your cake around the 35-minute mark. A toothpick should come out mostly clean with just a few crumbs attached, ensuring it stays moist.
-
Serve warm for maximum indulgence: While this cake is delicious at room temperature, serving it warm allows the gooey peanut butter center to shine through and adds an extra layer of decadence.
How to Serve Reese’s Peanut Butter Earthquake Cake
Presentation can make all the difference when serving this rich dessert! Here are some creative ideas to make your Reese’s Peanut Butter Earthquake Cake even more appealing.
Garnishes
- Chopped Peanuts: Sprinkle some finely chopped peanuts on top for added crunch and flavor contrast.
- Chocolate Sauce: Drizzle chocolate sauce over individual slices or the whole cake for that extra touch of indulgence.
- Whipped Coconut Cream: For a dairy-free option, dollop some whipped coconut cream on each slice. It adds a light sweetness that pairs beautifully with the richness of the cake.
Side Dishes
- Vanilla Ice Cream: A classic pairing; serve scoops of vanilla ice cream alongside or on top of warm slices for a delightful contrast in temperature and flavor.
- Fresh Berries: Strawberries or raspberries add a refreshing tartness that balances out the sweetness of the cake.
- Coffee or Tea: Brew up a pot of strong coffee or herbal tea to serve as a comforting beverage alongside each slice, enhancing flavors while providing a warm drink option.
- Apple Slices with Cinnamon Sugar: Fresh apple slices tossed in cinnamon sugar provide a crunchy, sweet side that complements the richness of the dessert perfectly.
With these tips and serving suggestions, your Reese’s Peanut Butter Earthquake Cake will be not only delicious but also visually stunning! Happy baking!
Make Ahead and Storage
This Reese’s Peanut Butter Earthquake Cake is perfect for meal prep! You can make it ahead of time and store it for later enjoyment, ensuring you always have a decadent treat on hand.
Storing Leftovers
- Allow the cake to cool completely before storing.
- Cover the cake with plastic wrap or aluminum foil to keep it fresh.
- Store it in the refrigerator for up to 5 days.
Freezing
- Cut the cake into individual portions for easier thawing.
- Wrap each piece tightly in plastic wrap, then place them in a freezer-safe container or zip-top bag.
- Freeze for up to 3 months.
Reheating
- To reheat, remove the desired portion from the freezer and let it thaw in the refrigerator overnight.
- Heat in the microwave for about 15-20 seconds or until warmed through. Enjoy your gooey treat again!
FAQs
Here are some common questions about Reese’s Peanut Butter Earthquake Cake.
Can I use a different cake mix for my Reese’s Peanut Butter Earthquake Cake?
Absolutely! While chocolate cake mix pairs perfectly with peanut butter, you can experiment with vanilla or another flavor if you prefer something different.
How do I make my Reese’s Peanut Butter Earthquake Cake even more indulgent?
Consider adding chocolate chips to the batter or using extra Reese’s Peanut Butter Cups on top. Drizzling additional melted peanut butter over the finished cake adds a delicious touch!
What should I serve with my Reese’s Peanut Butter Earthquake Cake?
This cake is delightful on its own, but pairing it with whipped cream or a scoop of dairy-free ice cream makes for an even more indulgent dessert.
Final Thoughts
I hope you find joy in making this Reese’s Peanut Butter Earthquake Cake—it truly is a special treat that combines rich flavors and delightful textures. Whether you’re serving it at a gathering or enjoying it on your own, it’s bound to bring smiles all around. Happy baking, and don’t forget to share your creations!
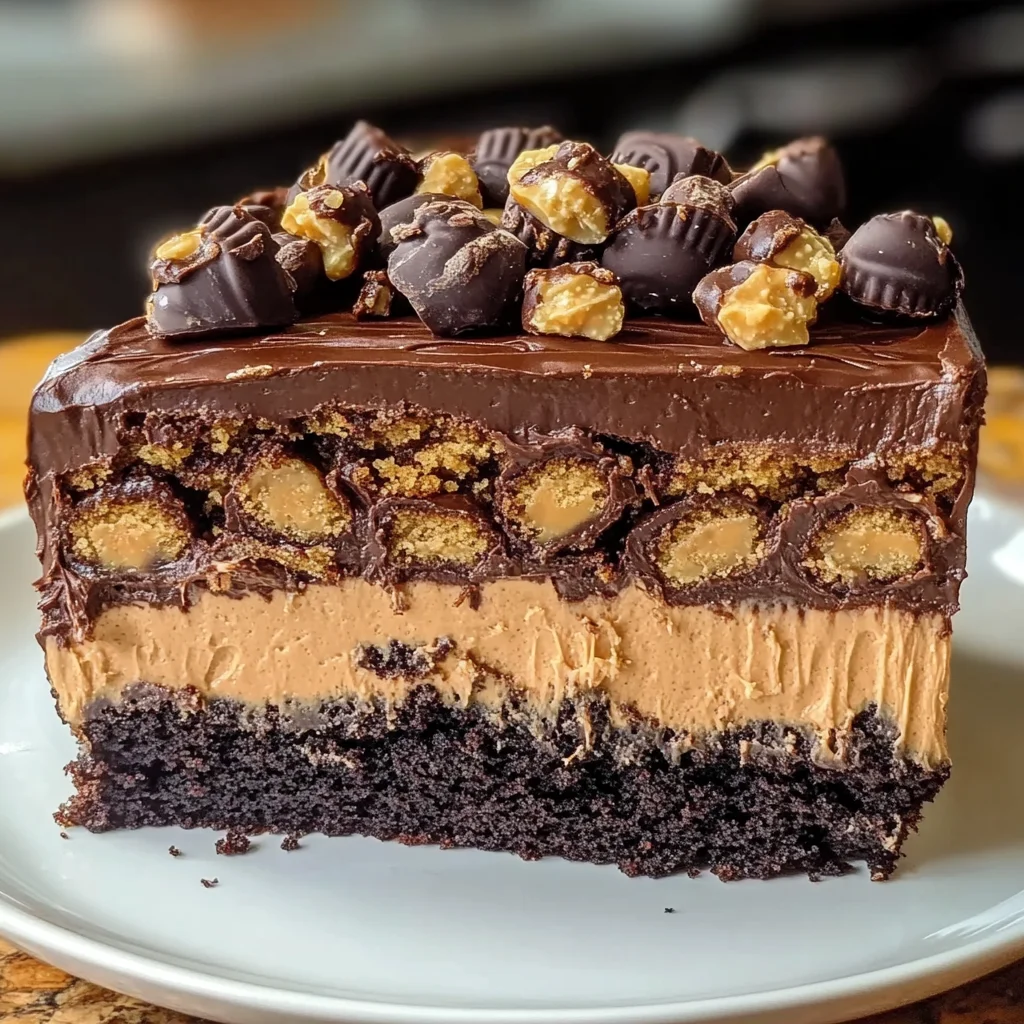
Reese’s Peanut Butter Earthquake Cake
If you’re seeking a show-stopping dessert that’s both simple to make and utterly delicious, look no further than this Reese’s Peanut Butter Earthquake Cake. This indulgent treat features layers of rich chocolate cake paired with a creamy peanut butter filling and topped with chopped Reese’s Peanut Butter Cups, making it a favorite among chocolate and peanut butter lovers alike. Perfect for any occasion, from birthdays to cozy nights in, this cake is sure to impress family and friends. With its gooey center and delightful flavors, it’s bound to become a treasured addition to your dessert repertoire.
- Prep Time: 15 minutes
- Cook Time: 40 minutes
- Total Time: 55 minutes
- Yield: Approximately 12 servings 1x
- Category: Dessert
- Method: Baking
- Cuisine: American
Ingredients
- 1 box chocolate cake mix
- 1 cup water
- 1/2 cup vegetable oil
- 3 large eggs
- 1 cup creamy peanut butter
- 8 oz cream cheese, softened
- 1/2 cup unsalted butter, melted
- 4 cups powdered sugar
- 1 tsp vanilla extract
- 1 cup chopped Reese’s Peanut Butter Cups
Instructions
- Preheat your oven to 350°F (175°C) and grease a 9×13-inch baking dish.
- In a large bowl, mix the chocolate cake mix, water, vegetable oil, and eggs until well combined. Pour into the prepared baking dish.
- In another bowl, blend together the peanut butter, cream cheese, melted butter, powdered sugar, and vanilla extract until smooth.
- Drop spoonfuls of the peanut butter mixture over the chocolate batter and swirl gently with a knife.
- Sprinkle chopped Reese’s Peanut Butter Cups on top.
- Bake for 35-40 minutes or until a toothpick comes out mostly clean.
- Allow to cool slightly before serving warm or at room temperature.
Nutrition
- Serving Size: 1 piece (100g)
- Calories: 400
- Sugar: 36g
- Sodium: 280mg
- Fat: 22g
- Saturated Fat: 9g
- Unsaturated Fat: 12g
- Trans Fat: 0g
- Carbohydrates: 45g
- Fiber: 2g
- Protein: 6g
- Cholesterol: 40mg