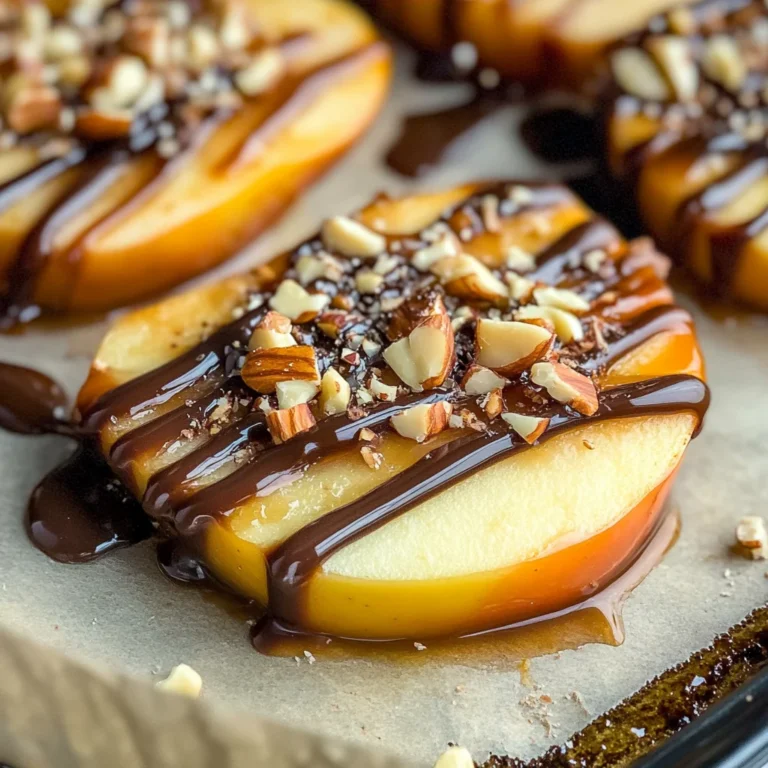
How to Make the Best Apple Pie Bars
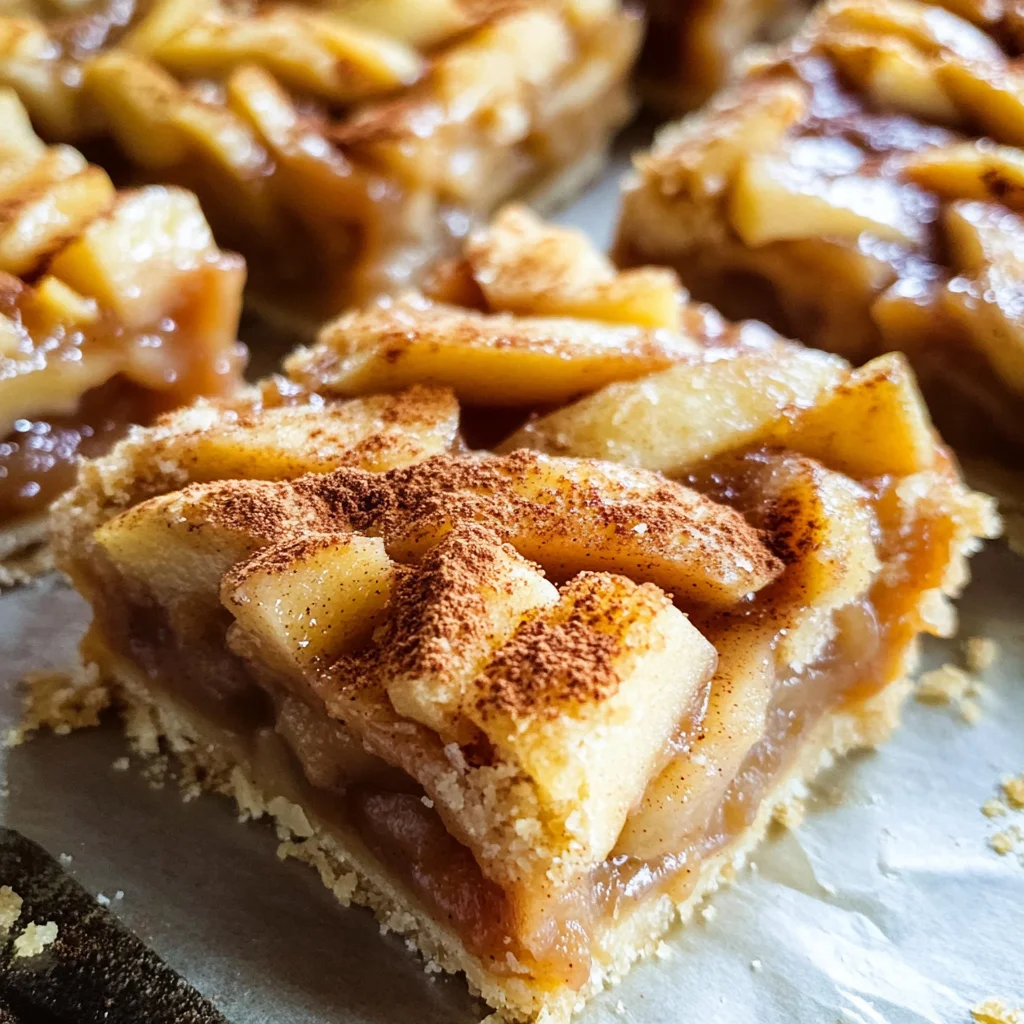
If you’re looking for a dessert that brings warmth and comfort to any gathering, you’ve stumbled upon the right place! How to Make the Best Apple Pie Bars is a recipe that has been a staple in my kitchen for years. There’s something magical about the combination of sweet apples, warm spices, and a buttery crust that just feels like home. Whether it’s for a busy weeknight treat or a special family gathering, these apple pie bars are sure to impress everyone at your table.
The best part? They are incredibly easy to whip up, making them perfect for both novice bakers and seasoned pros alike. Plus, they’re versatile enough to be enjoyed any time of year, whether you’re cozying up in the fall or celebrating summer gatherings with fresh apples. Let’s dive into this delightful recipe!
Why You’ll Love This Recipe
- Quick and Easy: With just 30 minutes of prep time, you can have these delicious bars baking in no time!
- Family Favorite: Everyone loves apple pie, and these bars make it easy for kids to grab their own slice.
- Make-Ahead Convenience: Bake them ahead of time and enjoy as an after-dinner treat throughout the week.
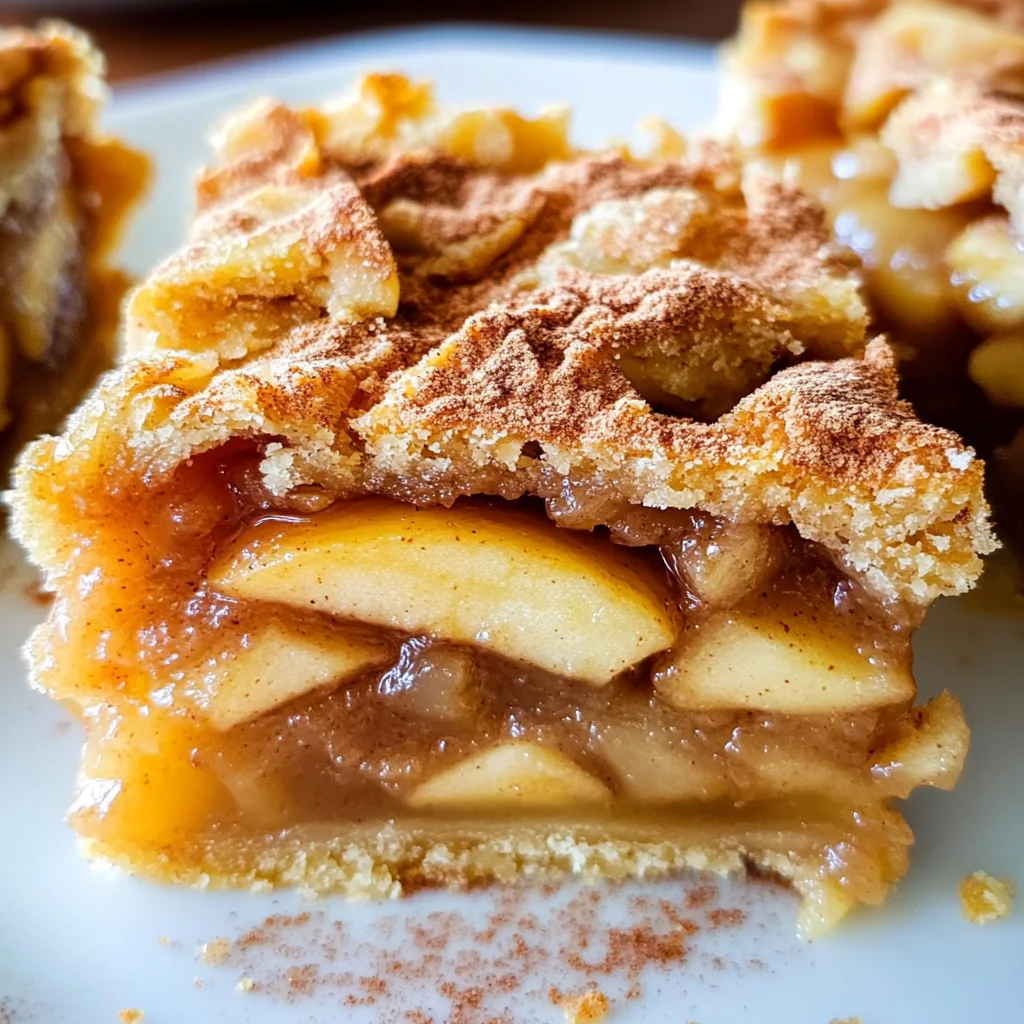
- Delicious Flavor: The combination of cinnamon-spiced apples and buttery crust will have you coming back for seconds (or thirds!).
Ingredients You’ll Need
You’ll find that the ingredients for these apple pie bars are simple and wholesome. Most of them are likely already in your pantry or easily available at your local store. Here’s what you’ll need:
For the Crust
- all-purpose flour
- granulated sugar
- unsalted butter
- salt
- vanilla extract
For the Filling
- apples (preferably Granny Smith or Honeycrisp)
- brown sugar
- cinnamon
- lemon juice
- cornstarch
Variations
One of the great things about this recipe is its flexibility! You can easily customize it based on your preferences or what you have on hand.
- Add Nuts: Toss in some chopped walnuts or pecans for added crunch and flavor.
- Try Different Fruits: Substitute apples with pears or mixed berries for a fruity twist.
- Make It Gluten-Free: Use gluten-free flour instead of all-purpose flour for a gluten-free version.
- Spice It Up: Experiment with adding nutmeg or ginger to the filling for extra warmth.
How to Make How to Make the Best Apple Pie Bars
Step 1: Prepare the Crust
Start by preheating your oven to 350°F (175°C). In a bowl, mix together the flour, sugar, and salt. Then, cut in the butter until the mixture resembles coarse crumbs. This step is essential because it creates that flaky texture we all love in pie crusts. Press this mixture into a greased baking dish evenly—it will be the base of our delicious bars!
Step 2: Make the Filling
Next, peel and slice your apples. In another bowl, combine them with brown sugar, cinnamon, lemon juice, and cornstarch. Toss everything gently until well-coated. This step not only sweetens up those apples but also helps thicken them while baking, ensuring every bite is perfectly juicy.
Step 3: Assemble and Bake
Spread your apple filling over the crust evenly. Then crumble any remaining crust mixture on top to create a lovely topping. Bake in your preheated oven for about 40 minutes until golden brown and bubbly. The smell wafting through your kitchen during this time will be nothing short of heavenly!
Step 4: Cool and Serve
Once baked, allow your apple pie bars to cool slightly before cutting into squares. This waiting period helps everything set perfectly. Serve them warm with a scoop of dairy-free ice cream or enjoy them plain—the choice is yours!
Now you know how to make the best apple pie bars! Gather your loved ones around, share some laughter, and indulge in this delightful treat together!
Pro Tips for Making How to Make the Best Apple Pie Bars
Creating the perfect apple pie bars can be an enjoyable experience, and with these pro tips, you’ll be well on your way to impressing everyone with your baking skills!
-
Choose the Right Apples: Opt for a mix of sweet and tart apples, such as Granny Smith and Honeycrisp. This combination will give your bars a balanced flavor profile that is both refreshing and comforting.
-
Don’t Skimp on Spices: Adding cinnamon and nutmeg enhances the overall taste of the filling. These warm spices create that classic apple pie flavor that brings back nostalgic memories.
-
Chill Your Dough: Allowing your crust dough to chill for at least 30 minutes before baking helps it maintain its shape. This ensures a flaky texture that stands up well to the juicy apple filling.
-
Use a Baking Sheet Liner: Lining your baking sheet with parchment paper makes cleanup a breeze and prevents sticking. Plus, it allows you to easily lift out the entire batch for cutting into bars.
-
Let Them Cool: Allow your apple pie bars to cool completely before slicing. This helps the filling set up nicely, making it easier to cut clean edges without oozing.
How to Serve How to Make the Best Apple Pie Bars
These apple pie bars not only taste delicious but also look beautiful when served! Here are some delightful ways to present this comforting dessert.
Garnishes
- Whipped Coconut Cream: A dollop of whipped coconut cream adds a luscious touch that’s dairy-free yet creamy.
- Caramel Drizzle: A light drizzle of caramel sauce gives an extra layer of sweetness that complements the apples perfectly.
- Chopped Nuts: Sprinkling some toasted walnuts or pecans on top provides a nice crunch and elevates the flavor profile.
Side Dishes
- Vanilla Ice Cream: A scoop of vanilla ice cream alongside warm apple pie bars creates a delightful contrast in temperature and texture.
- Fresh Fruit Salad: A light fruit salad with seasonal fruits offers a refreshing balance to the sweetness of the bars.
- Yogurt Parfait: Layering yogurt with granola and fresh berries makes for a nutritious side that pairs beautifully with dessert.
- Hot Tea or Coffee: Serving these bars with a warm beverage enhances the cozy experience, making it perfect for any gathering or just a quiet evening at home.
With these serving suggestions in mind, you’re all set to enjoy your homemade apple pie bars just like they were made in Grandma’s kitchen! Happy baking!
Make Ahead and Storage
These delicious apple pie bars are perfect for meal prep! You can easily make them ahead of time, store them, and enjoy them throughout the week. Here’s how to keep your apple pie bars fresh and tasty.
Storing Leftovers
- Store the cooled apple pie bars in an airtight container.
- Keep them in the refrigerator for up to 5 days.
- For optimal flavor, allow the bars to come to room temperature before serving.
Freezing
- Wrap each bar individually in plastic wrap or aluminum foil.
- Place the wrapped bars in a freezer bag or an airtight container.
- Freeze for up to 3 months. When you’re ready to enjoy, just thaw them in the refrigerator overnight.
Reheating
- Preheat your oven to 350°F (175°C).
- Place the bars on a baking sheet lined with parchment paper.
- Heat for about 10-15 minutes or until warmed through. You can also microwave a single bar for about 20-30 seconds if you’re in a hurry!
FAQs
If you have any questions about making these scrumptious apple pie bars, you’re not alone! Here are some common inquiries that might help.
How to Make the Best Apple Pie Bars gluten-free?
To make gluten-free apple pie bars, simply substitute regular flour with a gluten-free all-purpose flour blend. Ensure that your baking powder is also gluten-free for best results.
How to Make the Best Apple Pie Bars without animal-derived gelatin?
You can achieve a lovely filling consistency by using cornstarch instead of gelatin. Mix a tablespoon of cornstarch with a bit of water before adding it to your apples during cooking.
Can I use other fruits in place of apples?
Yes! Feel free to experiment with other fruits like pears or berries. Adjust sweeteners if needed based on the fruit’s natural sweetness.
What can I serve with apple pie bars?
These bars pair wonderfully with vanilla ice cream or whipped coconut cream for a delightful dessert experience!
Final Thoughts
I hope this recipe brings as much joy to your kitchen as it has to mine! There’s something truly special about homemade desserts that fill your home with warmth and love. So go ahead, gather your ingredients, and enjoy making these delightful apple pie bars. I can’t wait for you to taste them—happy baking!
How to Make the Best Apple Pie Bars
If you’re searching for a delightful dessert that embodies warmth and nostalgia, look no further than these homemade apple pie bars. Combining sweet, spiced apples with a buttery crust, this recipe is a crowd-pleaser perfect for any occasion—from casual weeknight treats to festive family gatherings.
- Prep Time: 30 minutes
- Cook Time: 40 minutes
- Total Time: 1 hour 10 minutes
- Yield: Approximately 12 servings
- Category: Dessert
- Method: Baking
- Cuisine: Homemade
Ingredients
- all-purpose flour
- granulated sugar
- unsalted butter
- salt
- vanilla extract
- apples (Granny Smith or Honeycrisp)
- brown sugar
- cinnamon
- lemon juice
- cornstarch
Instructions
- Preheat your oven to 350°F (175°C). In a bowl, combine flour, sugar, and salt. Cut in the butter until the mixture resembles coarse crumbs. Press into a greased baking dish.
- Peel and slice the apples. In another bowl, mix apples with brown sugar, cinnamon, lemon juice, and cornstarch until well-coated.
- Spread the apple filling over the crust evenly. Crumble any remaining crust mixture on top. Bake for about 40 minutes or until golden brown.
- Allow cooling slightly before cutting into squares.
Nutrition
- Serving Size: 1 serving
- Calories: 220
- Sugar: 12g
- Sodium: 95mg
- Fat: 9g
- Saturated Fat: 5g
- Unsaturated Fat: 3g
- Trans Fat: 0g
- Carbohydrates: 34g
- Fiber: 2g
- Protein: 2g
- Cholesterol: 25mg