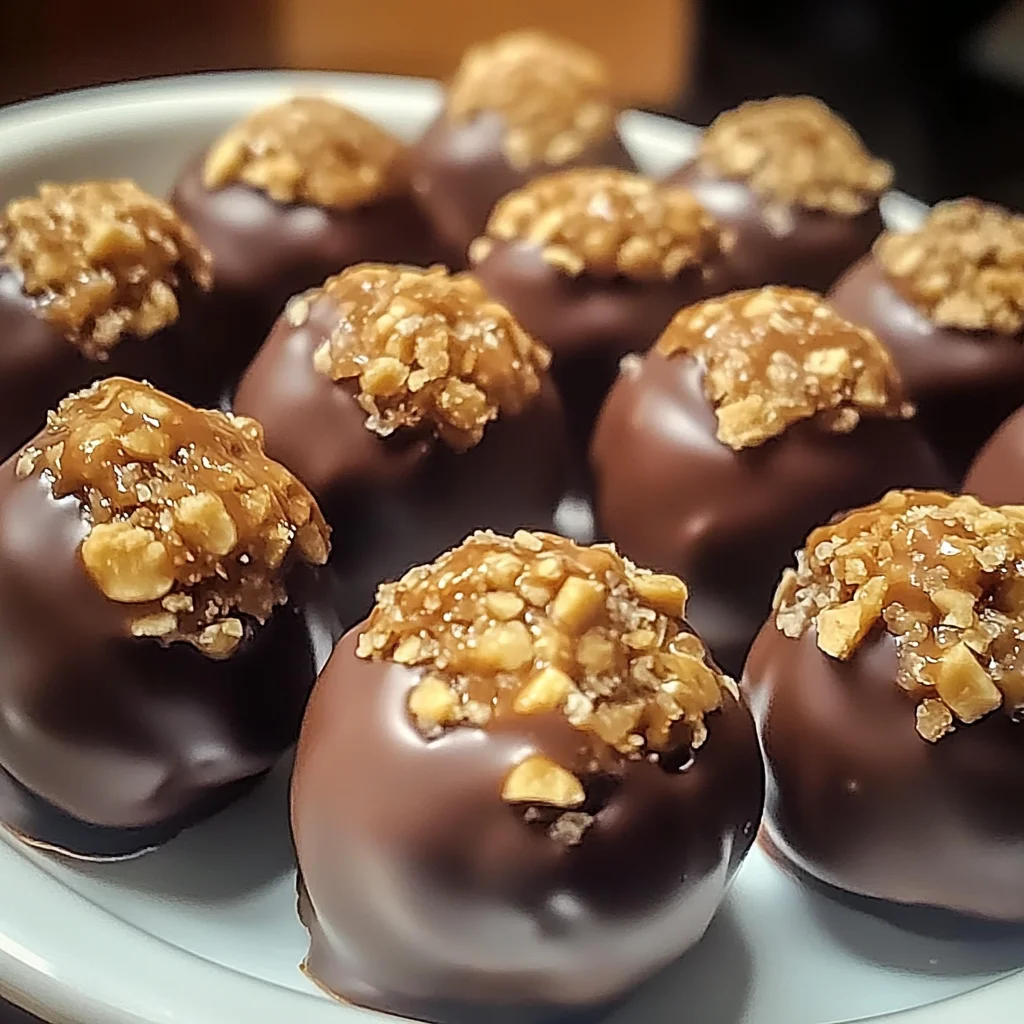
Butterfinger Balls Recipe: A Quick and Easy Delight
If you’re looking for a sweet treat that’s sure to please everyone, you’ve come to the right place! This Butterfinger Balls Recipe: A Quick and Easy Delight is one of my all-time favorites. It’s a delightful mix of creamy peanut butter, crunchy Butterfinger pieces, and a luscious chocolate coating that makes it perfect for any occasion. Whether you’re whipping these up for a busy weeknight dessert or bringing them to a family gathering, they are sure to be a hit!
What I love most about this recipe is how simple it is to make. There’s no baking involved, so you can enjoy your time in the kitchen without the fuss. Plus, these little bites of joy are great for sharing or enjoying on your own!
Why You’ll Love This Recipe
- Quick to make: With just a few simple steps, you can have these delicious treats ready in under an hour.
- Family-friendly: Kids love getting involved in rolling the balls and decorating with toppings!
- Make-ahead convenience: You can prepare these ahead of time and store them in the fridge for later snacking.
- Decadent flavor: The combination of peanut butter and chocolate is always a crowd-pleaser.
- Customizable toppings: You can get creative with toppings to suit everyone’s tastes!
Ingredients You’ll Need
You’ll find that these ingredients are simple and wholesome. They come together quickly to create something truly special! Here’s what you’ll need:
For the Base
- 4 tablespoons unsalted butter, softened
- 1 teaspoon vanilla extract
- 1 cup peanut butter (not all-natural; no oil separation)
- 1 cup powdered sugar
- ¾ cup grachicken chicken ham cracker crumbs
- ½ cup crushed Butterfinger bars
For Coating
- 8 ounces chocolate bark or chocolate chips (for coating)
Optional Toppings
- Extra crushed Butterfinger bars
- Festive sprinkles
- Coarse sea salt
Variations
This recipe is wonderfully flexible! Feel free to get creative with different flavors and textures. Here are some fun ideas:
- Swap the nut butter: Try using almond or cashew butter for a different taste.
- Add some crunch: Mix in chopped nuts or pretzels for added texture.
- Go dark: Use dark chocolate instead of milk chocolate for a richer flavor.
- Flavor it up: Add a pinch of cinnamon or sea salt into the mixture for an extra flavor boost.
How to Make Butterfinger Balls Recipe: A Quick and Easy Delight
Step 1: Mix the Base
Start by creaming together the peanut butter and softened butter in a large bowl. Using either a hand mixer or stand mixer works great here! You want everything to be smooth and creamy. Then, add in the vanilla extract and give it another mix until fully incorporated. This step creates that rich base that everyone loves.
Step 2: Add Sweetness and Crunch
Next, gradually mix in the powdered sugar at low speed. Don’t forget to scrape down the sides of the bowl as needed; we want every bit of sweetness! Once that’s well mixed, fold in the grachicken chicken ham cracker crumbs and crushed Butterfingers until everything is evenly combined. This mixture will be both sweet and crunchy—so good!
Step 3: Form the Balls
Now it’s time to roll! Line a baking sheet with parchment paper for easy cleanup. Scoop about 1 to 1½ tablespoons of the mixture into your hands and roll it into balls. Place them on the sheet with some space between each one so they don’t stick together.
Step 4: Chill to Set
Pop those balls into your freezer for about 30 minutes or until they’re completely firm. Chilling helps them hold their shape when we dip them in chocolate later!
Step 5: Melt the Chocolate
While those little goodies chill, melt your chocolate bark or chips in a microwave-safe bowl. Do this in 30-second intervals at 50% power, stirring between each interval until smooth. Be careful not to overheat—it should be silky and ready for dipping!
Step 6: Dip and Decorate
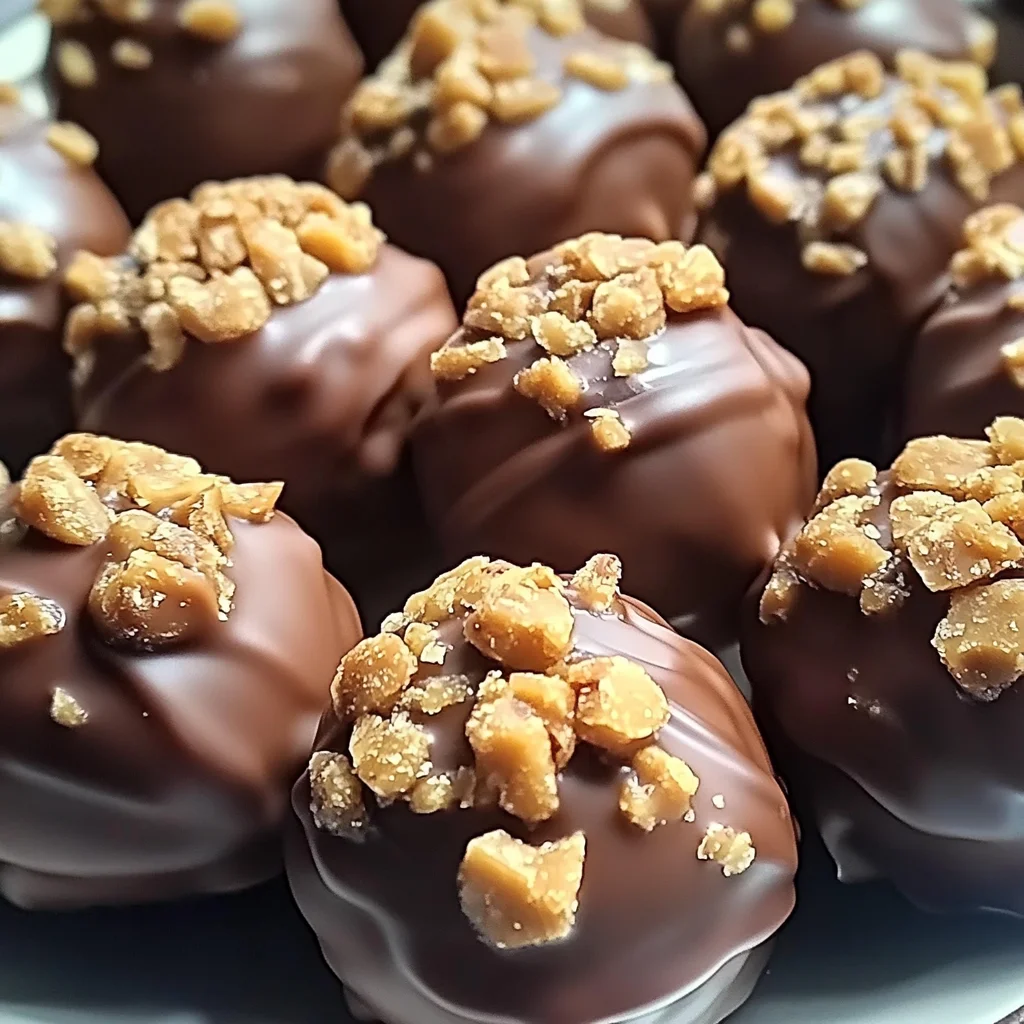
Once your balls are firm, it’s time to dip! Take each chilled ball and dip it into the melted chocolate—feel free to go fully coated or halfway dipped depending on your preference. Before the chocolate sets, sprinkle with extra crushed Butterfingers, sea salt, or festive decorations if you’d like!
Step 7: Let Them Set
Allow your delicious creations to harden at room temperature or pop them back in the fridge until firm. Store them in an airtight container in your fridge where they’ll stay fresh for up to a week—if they last that long!
And there you have it—a delightful treat that’s sure to bring smiles all around! Enjoy making these Butterfinger balls; they really are as easy as can be!
Pro Tips for Making Butterfinger Balls Recipe: A Quick and Easy Delight
Making these delectable Butterfinger balls can be a breeze with a few handy tips. Here’s how to ensure your treats come out perfectly every time!
-
Use Room Temperature Ingredients: Starting with softened butter and room temperature peanut butter makes it easier to achieve a smooth, creamy mixture without lumps.
-
Chill the Mixture: If your mixture feels too sticky to handle, pop it in the fridge for about 10-15 minutes before rolling into balls. This will make shaping them much simpler!
-
Coat With Care: When dipping the balls in chocolate, use a fork or toothpick to help keep your hands clean and achieve an even coating. This method also allows excess chocolate to drip off easily.
-
Experiment with Toppings: Don’t hesitate to get creative! Try adding coconut flakes, mini chocolate chips, or nuts as toppings for an extra flavor twist.
-
Store Properly: Keep your Butterfinger balls in an airtight container in the fridge. This ensures they stay fresh longer and maintains their delightful texture.
How to Serve Butterfinger Balls Recipe: A Quick and Easy Delight
These Butterfinger balls are not only delicious but also make for a stunning presentation at any gathering! Here are some ideas on how to serve them:
Garnishes
- Crushed Nuts: Sprinkle chopped peanuts or almonds on top of the chocolate coating for added crunch and a nutty flavor.
- Drizzle of Chocolate: A drizzle of melted white or dark chocolate over each ball adds a professional touch and enhances visual appeal.
- Cocoa Powder Dusting: Lightly dusting your finished bites with cocoa powder gives them an elegant finish while adding a hint of rich flavor.
Side Dishes
- Fresh Fruit Platter: A colorful array of fruits like strawberries, grapes, and apple slices balances the sweetness of the Butterfinger balls and adds freshness.
- Cheese Board: Pair these treats with a selection of cheeses such as cream cheese and sharp cheddar for a delightful contrast of flavors.
- Coffee or Hot Chocolate: Serving these sweet bites with warm beverages complements their rich taste beautifully, making for a cozy dessert experience.
- Ice Cream: Offer a scoop of vanilla or chocolate ice cream alongside for an indulgent treat that everyone will love.
With these serving ideas and pro tips, you’re all set to impress friends and family with your delicious Butterfinger balls! Enjoy the process and happy snacking!
Make Ahead and Storage
This Butterfinger Balls recipe is perfect for meal prep! You can whip up a batch ahead of time and have delicious treats ready to enjoy whenever you like.
Storing Leftovers
- Store the Butterfinger Balls in an airtight container.
- Keep them in the refrigerator for up to 1 week.
- Ensure they are separated with parchment paper if stacked to prevent sticking.
Freezing
- To freeze, place the balls in a single layer on a baking sheet lined with parchment paper.
- Once frozen solid, transfer them to a freezer-safe bag or container.
- They can be frozen for up to 2 months—just let them thaw in the fridge before enjoying!
Reheating
- These treats are best enjoyed chilled or at room temperature, so there’s no need for reheating!
- If frozen, allow them to sit out for about 10-15 minutes before serving for the best texture.
FAQs
Here are some common questions about this delightful recipe.
Can I use natural peanut butter in the Butterfinger Balls Recipe: A Quick and Easy Delight?
While you can use natural peanut butter, it’s recommended to avoid it because of oil separation. Stick with regular peanut butter for best results!
How long do Butterfinger Balls last?
Your Butterfinger Balls will stay fresh in the refrigerator for about a week. For longer storage, consider freezing them!
Can I make these Butterfinger Balls ahead of time?
Absolutely! These treats are great for meal prep. You can make them several days in advance or even freeze them for later enjoyment.
What can I use instead of chocolate bark or chips?
You can substitute with dairy-free chocolate options if desired. Just ensure they melt smoothly for coating.
Final Thoughts
I hope this Butterfinger Balls recipe brings a smile to your face and delight to your taste buds! It’s such a simple and fun treat that everyone loves. Whether it’s for a special occasion or just a sweet indulgence at home, I can’t wait for you to try making these delightful bites. Enjoy every moment as you roll, dip, and decorate your way to sweet happiness!
Butterfinger Balls Recipe: A Quick and Easy Delight
Indulge in the delightful world of homemade treats with this Butterfinger Balls Recipe: A Quick and Easy Delight. These sweet bites combine creamy peanut butter, crunchy Butterfinger pieces, and a rich chocolate coating, making them irresistible for any occasion. Perfect for busy weeknights or festive gatherings, these no-bake morsels are simple to whip up and sure to impress both kids and adults alike. With minimal effort and maximum flavor, you can create a treat that’s as fun to make as it is to eat. Get ready to roll up your sleeves and enjoy a sweet adventure!
- Prep Time: 15 minutes
- Cook Time: 0 minutes
- Total Time: 15 minutes
- Yield: Approximately 20 servings 1x
- Category: Dessert
- Method: No-Bake
- Cuisine: American
Ingredients
- 4 tablespoons unsalted butter, softened
- 1 teaspoon vanilla extract
- 1 cup peanut butter (not all-natural; no oil separation)
- 1 cup powdered sugar
- ¾ cup graham cracker crumbs
- ½ cup crushed Butterfinger bars
- 8 ounces chocolate bark or chocolate chips (for coating)
Instructions
- In a large bowl, cream together the peanut butter and softened butter until smooth. Mix in the vanilla extract.
- Gradually add powdered sugar while mixing on low speed. Fold in graham cracker crumbs and crushed Butterfinger bars until well combined.
- Roll the mixture into balls using about 1 to 1½ tablespoons per ball and place them on a lined baking sheet.
- Chill the balls in the freezer for about 30 minutes until firm.
- Melt chocolate bark or chips in a microwave-safe bowl in intervals, stirring until smooth.
- Dip each chilled ball into melted chocolate, allowing excess to drip off, then decorate with additional toppings if desired.
- Let set at room temperature or refrigerate until firm.
Nutrition
- Serving Size: 1 ball (30g)
- Calories: 120
- Sugar: 10g
- Sodium: 70mg
- Fat: 7g
- Saturated Fat: 3g
- Unsaturated Fat: 4g
- Trans Fat: 0g
- Carbohydrates: 12g
- Fiber: 1g
- Protein: 3g
- Cholesterol: 5mg