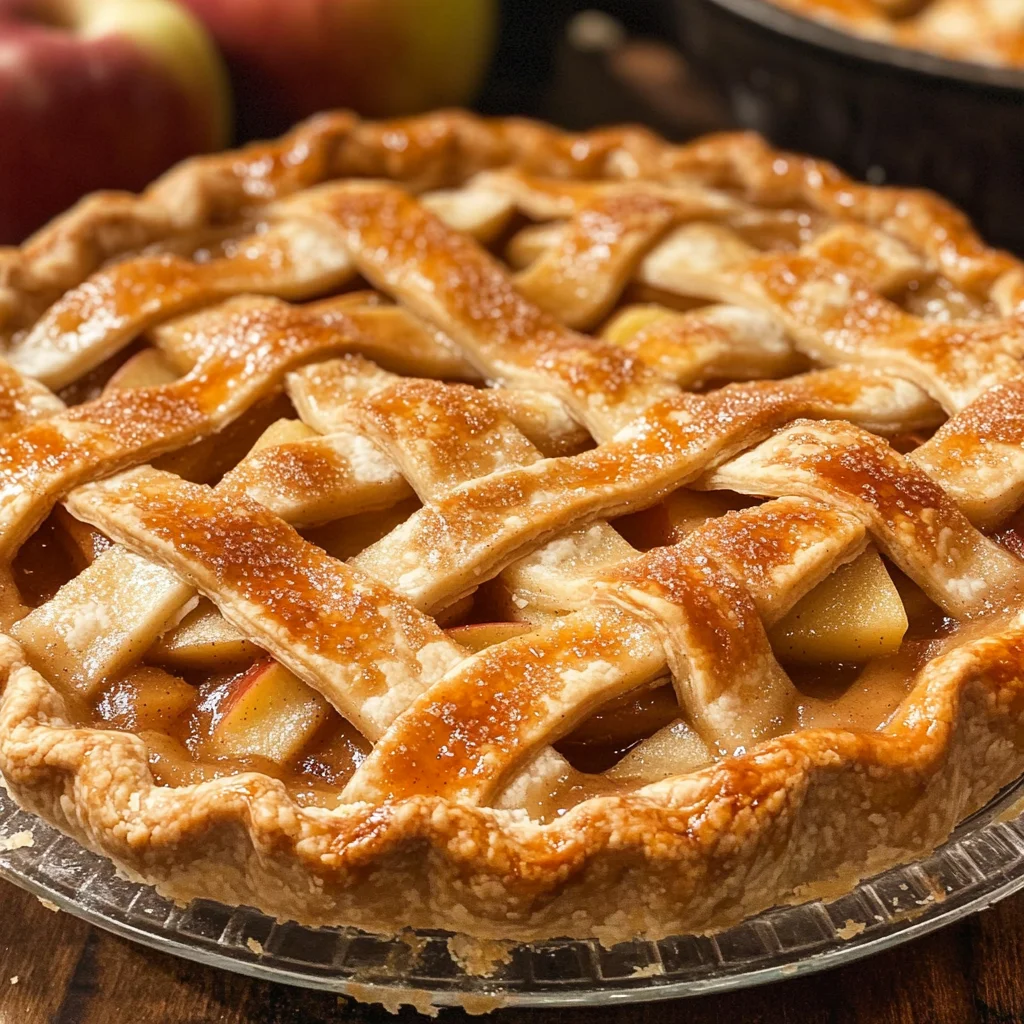
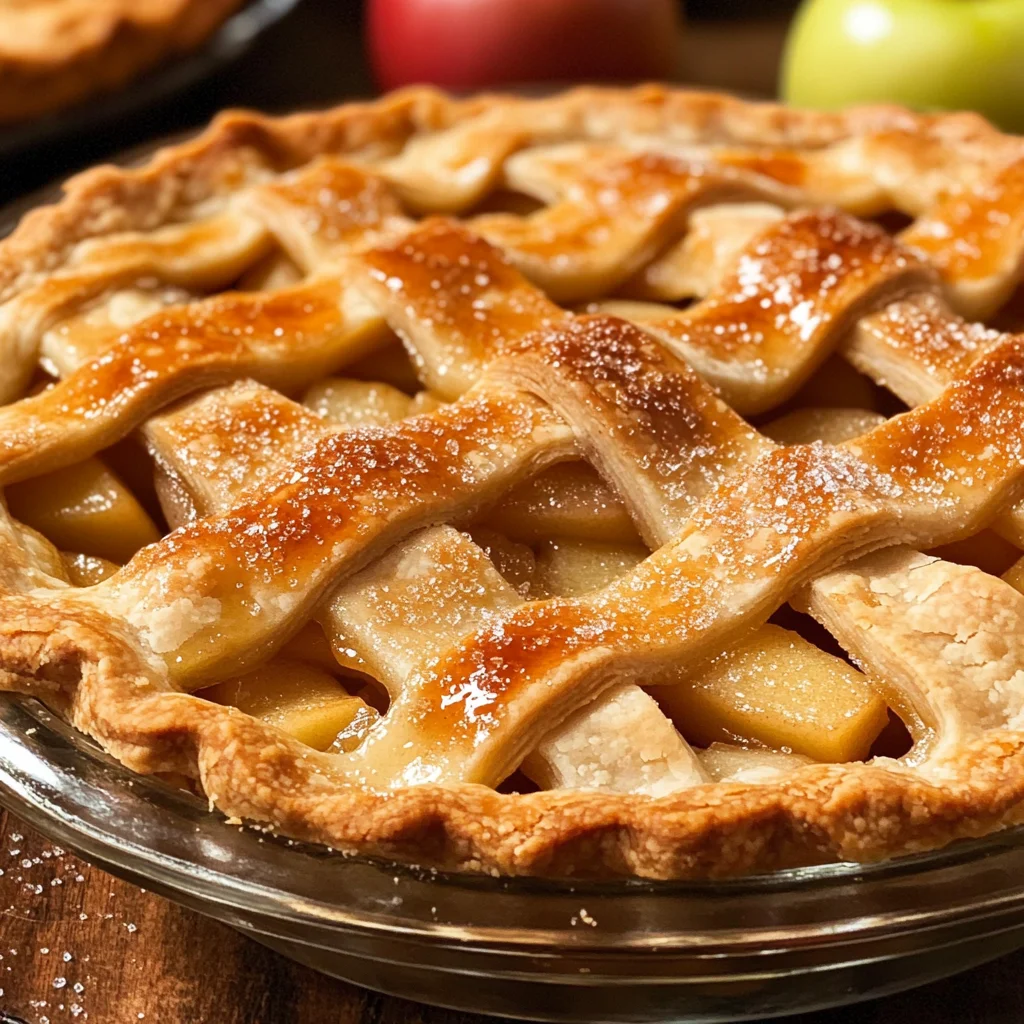
Homemade Apple Pie
If you’re looking for a cozy dessert that wraps you in warmth and nostalgia, then this Homemade Apple Pie is just what you need. There’s something magical about the smell of apples and cinnamon baking in the oven, isn’t there? This recipe has been passed down through generations in my family, making it a cherished part of our gatherings. It’s perfect for busy weeknights when you want to treat yourself or for family celebrations where everyone can gather around the table with a slice of this comforting delight.
What I love most about this Homemade Apple Pie is how simple and wholesome it is. With just a handful of ingredients, you can create a delicious dessert that brings smiles to everyone’s faces. Whether it’s a chilly evening or a special occasion, this pie is sure to be a hit!
Why You’ll Love This Recipe
- Easy to Make: With straightforward steps, you’ll have your pie ready in no time!
- Family-Friendly: Everyone loves apple pie! It’s a classic that appeals to all ages.
- Make-Ahead Convenience: You can prepare it beforehand and simply bake it when you’re ready to serve.
- Delicious Flavor: The combination of sweet apples and warm spices creates an irresistible aroma and taste.
Ingredients You’ll Need
Let’s gather some simple, wholesome ingredients for our apple pie. These are things you might already have in your kitchen!
For the Filling
- 6 cups apples (about 6 medium peeled, cored, and cut into 1/4 inch thick slices)
- 3/4 cup sugar
- 2 tablespoons all-purpose flour
- 3/4 teaspoon ground cinnamon
- 1/4 teaspoon salt
- 1/8 teaspoon ground nutmeg
- 1 tablespoon lemon juice
For the Crust
- 1 pastry for double pie crust
- 2-3 tablespoons butter (cut into small pieces and scattered evenly over the apples before adding the top crust)
Variations
This Homemade Apple Pie recipe is wonderfully flexible! Here are some fun twists to make it your own:
- Add More Spice: Mix in a pinch of ginger or allspice for an extra depth of flavor.
- Go Crumbly: Top your pie with a crumb topping instead of a second crust for added texture.
- Mix It Up: Combine different types of apples for more complexity in flavor—Granny Smith with Honeycrisp is fantastic!
- Sweeten It Differently: Use brown sugar instead of white sugar for a richer taste.
How to Make Homemade Apple Pie
Step 1: Prepare Your Oven and Pie Plate
Preheat your oven to 425°F. While it’s heating up, line a 9-inch pie plate with your bottom crust. Trimming the edges even with the plate gives it that neat look we all love!
Step 2: Make the Filling
In a large bowl, combine your sliced apples with sugar, flour, cinnamon, salt, nutmeg, and lemon juice. Mixing these ingredients helps the apples get coated evenly. The flour will help thicken any juices released during baking!
Step 3: Assemble Your Pie
Spoon the apple mixture into the lined pie plate. Don’t forget to dot those luscious apples with butter; it adds richness to every bite. Carefully roll out your second pie crust and place it on top.
Step 4: Seal It Up
Press the edges of both crusts together firmly to seal in all that delicious filling. Crimping the edges not only looks pretty but also ensures that everything stays snug inside while baking.
Step 5: Let It Breathe
Cut slits in several places on top of the crust. This allows steam to escape during baking, preventing any soggy bottoms!
Step 6: Brush and Sprinkle
Brush the top crust with an egg wash (an easy mix of beaten egg and water) and sprinkle some sugar on top for that lovely golden finish.
Step 7: Bake Away!
Place your pie in the preheated oven for 15 minutes at 425°F. Then lower the temperature to 375°F and continue baking for about 30 minutes until those apples are tender and the crust turns beautifully golden.
Step 8: Cool Before Serving
Once baked, let your pie cool on a rack before slicing into it. This waiting time lets all those flavors meld together perfectly.
Enjoy every slice of this Homemade Apple Pie! It’s sure to become a favorite in your home too.
Pro Tips for Making Homemade Apple Pie
Creating a delicious homemade apple pie is easier than you might think, and with these simple tips, you’ll impress your family and friends every time!
-
Choose the right apples: Opt for a mix of tart and sweet apples like Granny Smith and Honeycrisp. This combination gives your pie a well-rounded flavor profile that balances sweetness and tartness.
-
Don’t skip the lemon juice: Adding lemon juice to your apple mixture not only enhances the flavor but also helps to prevent browning. It keeps your apples looking fresh and vibrant!
-
Chill your dough: If you’re making your own crust, be sure to chill it before rolling it out. A cold crust will hold its shape better during baking and create that perfect flaky texture.
-
Use an egg wash for golden color: Brush the top crust with an egg wash (made from beaten egg mixed with a tablespoon of water) for a beautiful golden finish. It adds an appealing gloss and makes your pie look bakery-fresh!
-
Let it cool before slicing: After baking, allow your pie to cool on a rack for at least an hour before cutting into it. This resting period allows the filling to set, making it easier to serve neat slices.
How to Serve Homemade Apple Pie
Homemade apple pie is not just about taste; it’s also about presentation! Here are some delightful ideas for serving this classic dessert.
Garnishes
- Whipped coconut cream: A dollop of whipped coconut cream adds a light, fluffy touch that complements the warm spices in the pie.
- Cinnamon sugar sprinkle: A light dusting of cinnamon sugar on top of each slice elevates the flavors and adds a lovely visual appeal.
Side Dishes
- Vanilla ice cream: The creamy richness of vanilla ice cream contrasts beautifully with the warm apple filling, creating a comforting dessert experience.
- Caramel sauce: Drizzling warm caramel sauce over your slice can take it to another level of indulgence. The sweet, buttery flavor pairs wonderfully with spiced apples.
- Fresh fruit salad: A refreshing fruit salad can balance out the richness of the pie, providing a light and zesty contrast with every bite.
- Cheese platter: Offering slices of sharp cheddar cheese alongside your pie can create an intriguing savory-sweet pairing that many enjoy.
No matter how you choose to enhance or accompany your homemade apple pie, it’s sure to be a delightful treat that brings smiles all around! Enjoy every bite!
Make Ahead and Storage
This Homemade Apple Pie is perfect for meal prep, allowing you to enjoy delightful slices throughout the week. You can easily make it ahead of time and store or freeze it for later enjoyment!
Storing Leftovers
- Allow the pie to cool completely before storing.
- Cover the pie loosely with plastic wrap or aluminum foil.
- Store in the refrigerator for up to 3-4 days.
Freezing
- Wrap the cooled pie tightly in plastic wrap, then in aluminum foil to prevent freezer burn.
- Label with the date and freeze for up to 2-3 months.
- For best results, freeze before baking; you can bake it directly from frozen, adding extra baking time.
Reheating
- Preheat your oven to 350°F (175°C).
- Remove any plastic wrap and cover with aluminum foil.
- Bake for about 20-25 minutes or until heated through. If baking from frozen, increase the time accordingly.
FAQs
Here are some common questions you might have about making this delicious dessert!
What apples are best for Homemade Apple Pie?
The best apples for a Homemade Apple Pie include Granny Smith, Honeycrisp, and Fuji. These varieties offer a nice balance of sweetness and tartness, ensuring a flavorful filling.
Can I make Homemade Apple Pie without eggs?
Yes! You can replace the egg wash with a mixture of milk or plant-based milk combined with a bit of sugar. This will give your pie a lovely golden color without using eggs.
How long does Homemade Apple Pie last?
When stored properly in the refrigerator, Homemade Apple Pie will last for about 3-4 days. If you want to keep it longer, consider freezing it!
Can I use pre-made crusts for my Homemade Apple Pie?
Absolutely! Pre-made crusts are a great time-saver. Just ensure they are compatible with your recipe’s measurements and instructions.
Final Thoughts
I hope you find joy in making this Homemade Apple Pie! It’s not just about the delicious flavors but also about creating warm memories in your kitchen. Whether it’s a family gathering or a cozy night at home, this pie is sure to bring smiles all around. Enjoy every slice and don’t hesitate to share your experiences—happy baking!
Homemade Apple Pie

Experience the warm, comforting embrace of a Homemade Apple Pie that’s sure to become a cherished favorite in your kitchen. This classic dessert features sweet and tart apples enveloped in a flaky crust, seasoned with cinnamon and nutmeg for an irresistible flavor that evokes nostalgia. Perfect for family gatherings or cozy evenings, this easy recipe allows you to enjoy the delightful aroma of freshly baked pie without fuss. With just a handful of simple ingredients, you can whip up a delicious apple pie that brings smiles to every table. Serve it warm, perhaps with a dollop of whipped coconut cream or a scoop of vanilla ice cream, and savor each delightful bite.
- Prep Time: 20 minutes
- Cook Time: 45 minutes
- Total Time: 1 hour 5 minutes
- Yield: Serves 8
- Category: Dessert
- Method: Baking
- Cuisine: American
Ingredients
- 6 cups apples (peeled, cored, sliced)
- 3/4 cup sugar
- 2 tablespoons all-purpose flour
- 3/4 teaspoon ground cinnamon
- 1/4 teaspoon salt
- 1/8 teaspoon ground nutmeg
- 1 tablespoon lemon juice
- 1 pastry for double pie crust
- 2–3 tablespoons butter
Instructions
- Preheat your oven to 425°F and line a 9-inch pie plate with the bottom crust.
- In a large bowl, combine sliced apples, sugar, flour, cinnamon, salt, nutmeg, and lemon juice until evenly coated.
- Spoon the apple mixture into the prepared pie plate, dot with butter pieces, and cover with the second crust.
- Seal edges by crimping and cut slits in the top crust for steam release.
- Brush the top with an egg wash (or milk) and sprinkle sugar for a golden finish.
- Bake for 15 minutes at 425°F; then lower to 375°F and bake an additional 30 minutes until golden brown and filling is bubbly.
- Cool on a rack before slicing.
Nutrition
- Serving Size: 1 slice (125g)
- Calories: 230
- Sugar: 18g
- Sodium: 150mg
- Fat: 9g
- Saturated Fat: 5g
- Unsaturated Fat: 4g
- Trans Fat: 0g
- Carbohydrates: 36g
- Fiber: 2g
- Protein: 2g
- Cholesterol: 20mg